
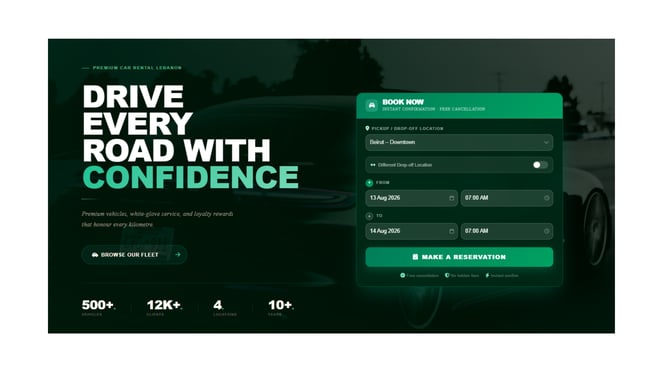
The Reservation Plugin allows you to offer an online booking experience directly from your website or through a standalone reservation page.
This guide walks you through configuring the customer booking journey, customizing the appearance and content of the plugin, enabling vehicles and rates for online reservations, and adding the completed plugin to your website.
1. Access the Reservation Plugin
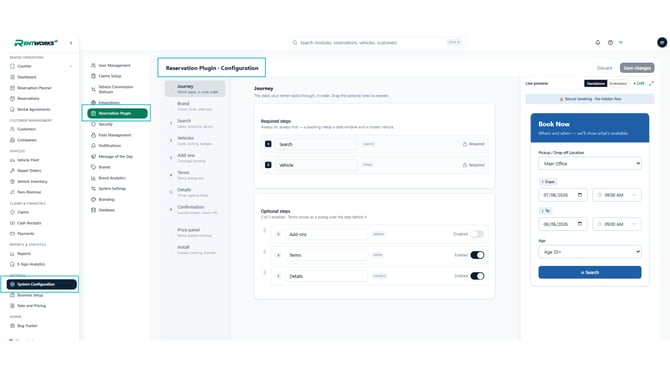
Navigate to:
System Configuration → Reservation Plugin
From the Reservation Plugin configuration page, you can manage the different stages of the online booking experience, including search options, vehicle selection, Terms & Conditions, customer information, and booking confirmation.
Tip: Use the Live Preview displayed on the right side of the page to review how your changes will appear to customers before publishing them.
2. Customize the Booking Experience
Open the Brand section to customize the appearance of your Reservation Plugin.
You can select a predefined color preset or configure your own brand colors to better match your company website and branding.
Once you are satisfied with your changes, select Save Changes.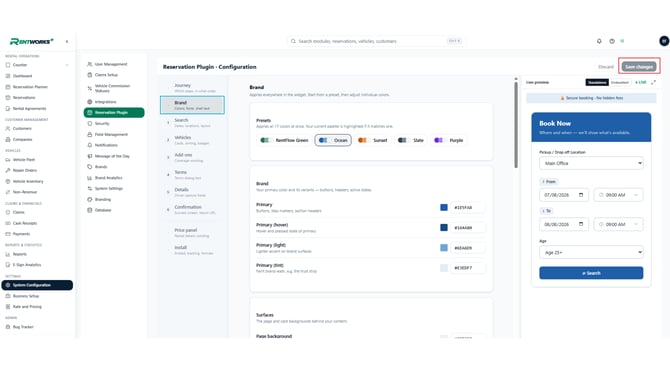
3. Configure Reservation Search Options
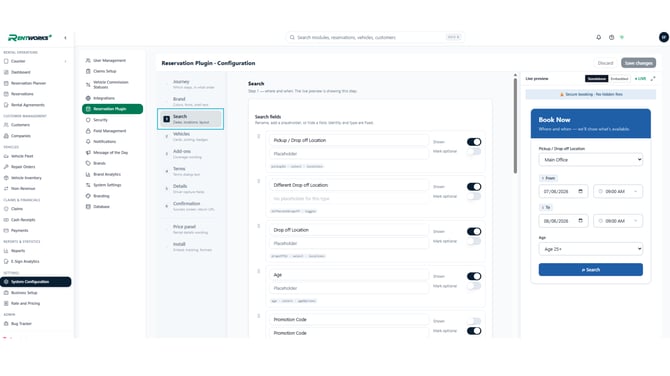
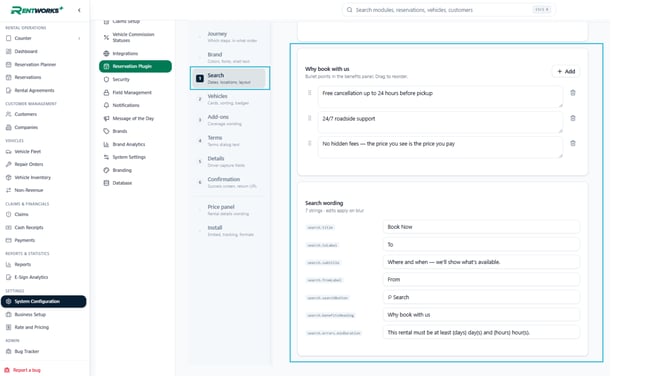
Open the Search section to determine which information customers will see and enter when beginning a reservation.
Available fields can include:
- Pickup / Drop-off Location
- Different Drop-off Location
- Age
- Promotion Code
Depending on your reservation requirements, fields can be displayed, hidden, or marked as optional.
4. Customize Search Messaging
Within the Search configuration, you can also customize the wording customers see when beginning their reservation.
Use the Why book with us section to highlight important customer benefits, such as free cancellation, roadside support, or no hidden fees.
You can also customize customer-facing:
- Labels
- Headings
- Buttons
- Validation messages
Use the Live Preview to review your changes as you configure the booking experience.
5. Configure Vehicle Search Results
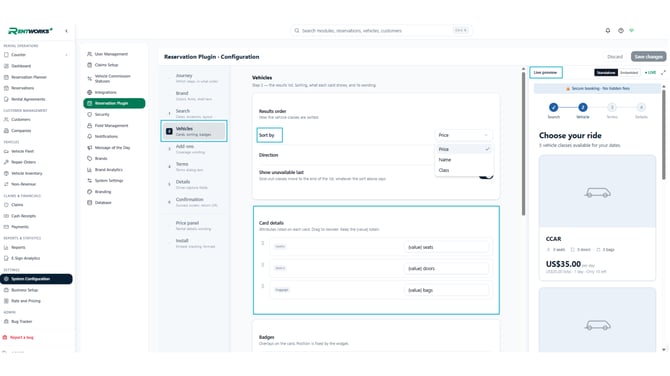
Open the Vehicles section to control how available vehicle classes are presented during the booking process.
You can choose how vehicle results are sorted, including by:
- Price
- Name
- Class
You can also configure the information displayed on each vehicle card.
Use the Live Preview to confirm that vehicle options are displayed as expected.
6. Configure Terms & Conditions
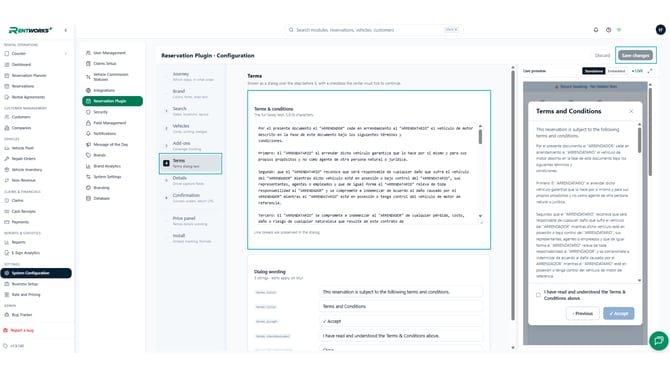
Open the Terms section to add the Terms & Conditions customers should review as part of the reservation process.
You can customize the Terms & Conditions content, dialog wording, and acceptance message.
When the Terms step is enabled, customers must acknowledge the Terms & Conditions before they can continue with their reservation.
7. Choose the Customer Information to Collect
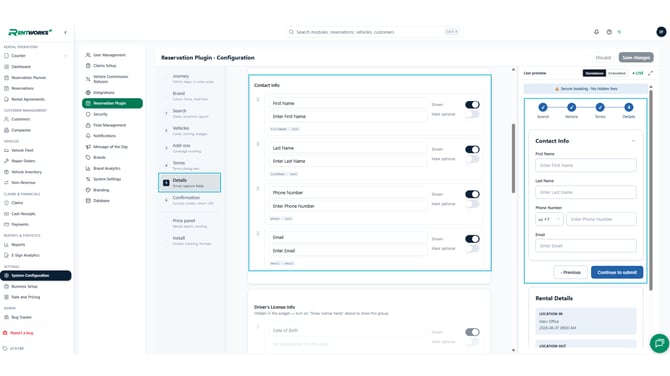
Open the Details section to configure the customer information collected before a reservation is submitted.
Available information can include:
- First Name
- Last Name
- Phone Number
- Driver's License information
Choose which fields should be displayed and which fields can be optional based on your business requirements.
8. Customize the Booking Confirmation
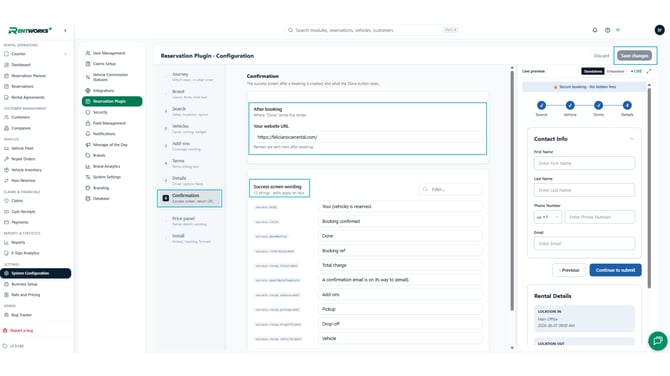
Open the Confirmation section to configure what customers see after successfully creating a reservation.
Enter your website URL to determine where customers are redirected after selecting Done.
You can also customize confirmation wording, including:
- Booking Confirmed
- Booking Reference
- Total Charge
- Pickup
- Drop-off
- Vehicle
Select Save Changes when your configuration is complete.
9. Add the Reservation Plugin to Your Website
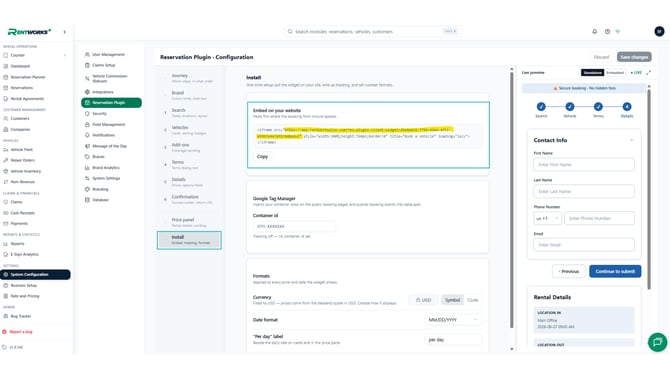
Once your Reservation Plugin configuration is complete, open the Install section.
You have two options for making the Reservation Plugin available to customers:
Embed it on your website:
Copy the complete embed code provided by RentWorks+ and add it to the appropriate page of your website.
Use a standalone reservation page:
Copy the provided standalone link and share it directly with your customers.
10. Configure Vehicle Images for Online Reservations
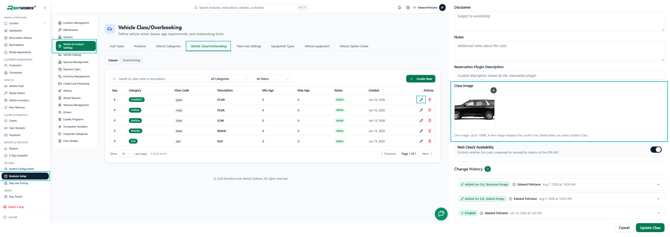
To control which images and descriptions appear for your vehicle classes, navigate to:
Business Setup → Vehicle & Product Settings → Vehicle Class/Overbooking
Edit the applicable vehicle class and upload the image you want displayed in the Reservation Plugin.
You can also add a custom Reservation Plugin Description and control whether the vehicle class is available for web availability searches.
Select Update Class to save your changes.
11. Enable Rates for Online Reservations
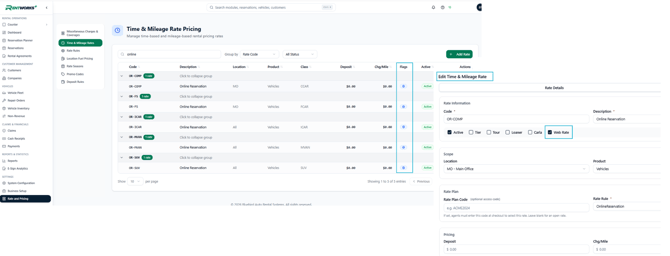
For a rate to be available through the Reservation Plugin, navigate to:
Rate and Pricing → Time & Mileage Rates
Open the applicable rate and enable Web Rate.
The Web Rate indicator helps you identify which rates are currently enabled for online reservations.
Before making your Reservation Plugin available to customers, verify that the correct location, vehicle class, rate rule, and pricing have been configured.
Before You Go Live
Review the complete booking journey using the Live Preview and confirm that your branding, search options, vehicles, Terms & Conditions, customer information fields, confirmation messaging, vehicle images, and web rates are configured correctly.
Once everything has been reviewed, your Reservation Plugin is ready to be embedded on your website or shared with customers as a standalone booking page.
Need Further Assistance?
If this article didn’t answer your question or you need additional assistance, our team is here to help.
Please Contact our Support team at help@rentworksplus.com, and we’ll be happy to assist you further.